In this article, Shopygo shows how to create an app in the App Dashboard, obtain a temporary Instagram User Access Token, and then access the API for an Instagram user's profile using the token. When you've finished the tutorial, you'll know how to receive access tokens and permissions from your app users.
You must "create an app" on Facebook for Developers before generating your Access Token.
Step-1
Application Register on Facebook for Developers
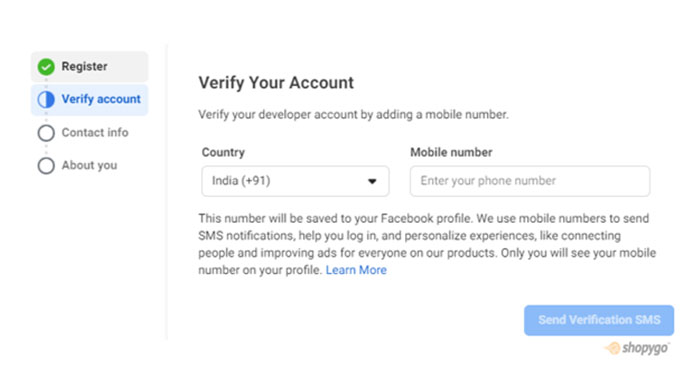
Sign up into Facebook and go to Facebook Developers Account
Facebook for Developers is an independent solution where you can sign in with an existing account or create a new one, which you will verify using the verification number Facebook will send to your phone.
OR
Go to Facebook for Developers and Click Get Started
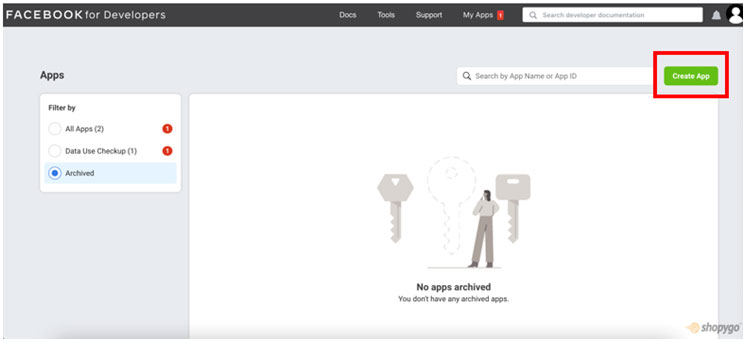
Create a New App
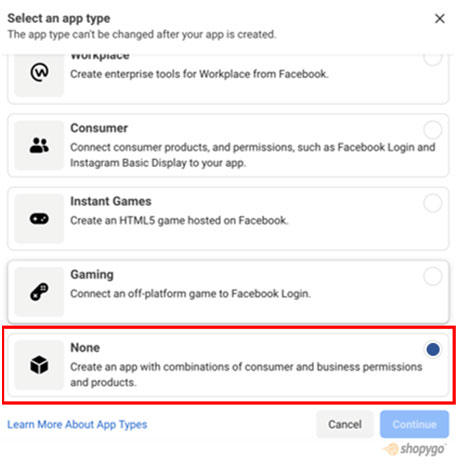
When you click the Create App button, a popup window will appear, asking you to specify what your app should perform.
First select None Options to register an app with custom permissions.
Step-2
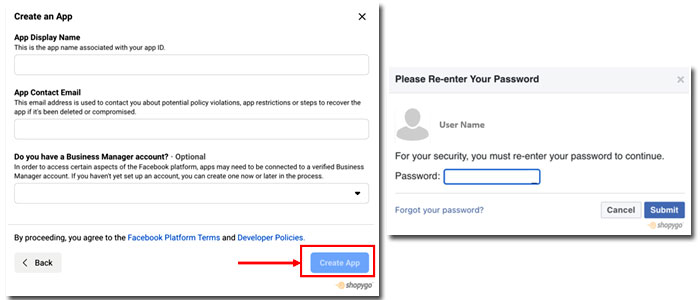
Create a New App
When you create an app, a pop-up box will appear in which you must enter the following information:
- a name for your app,
- a contact email address,
- a link to your Business Manager Account if any.
Step-3
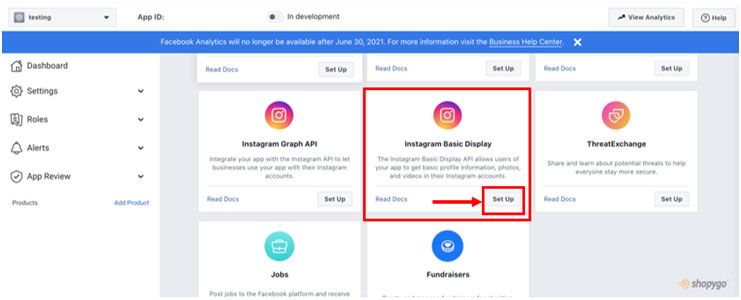
Set up Instagram's Basic Display
You will be directed to a new page after successfully adding a new app, where you must modify Instagram Basic Display and also add a tester in order to create your Access Token.
Under Instagram Basic Display, select Set Up. You'll notice that there are two Instagram alternatives. Select the Instagram Basic Display option.
Go to Basic Display and scroll all the way to the bottom of the page. To make a new app, click the Create New App button. You will be immediately led to the Basic Display section, but if you get confused, return to this area.

Choose the name you came up with in Step 2 as the app name. Do not modify this name because it will be shown automatically.

Step-4
Get the Access Token
In order to generate an Access Token, you'll need to add an Instagram Test User here. Go to the Basic Display section of the menu. You will be automatically directed to this section after creating an app.
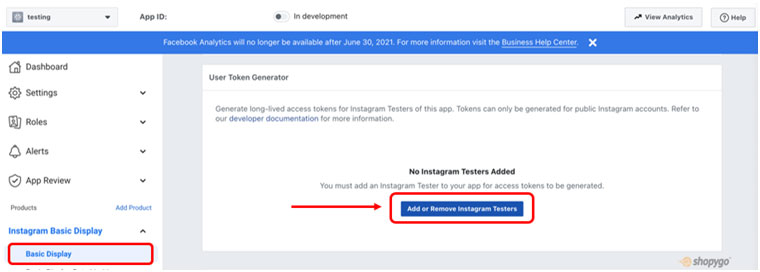
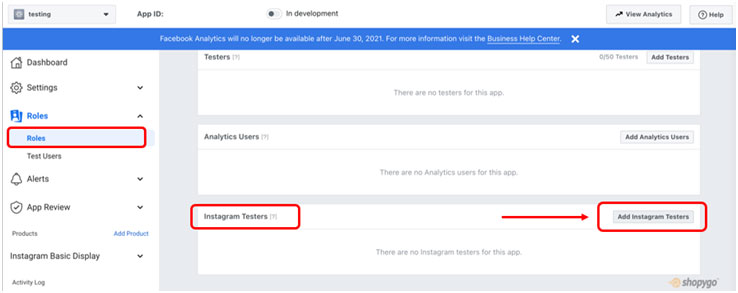
Click the option Add Instagram Testers. Make sure to add a tester to the Instagram Tester section because there are two options.
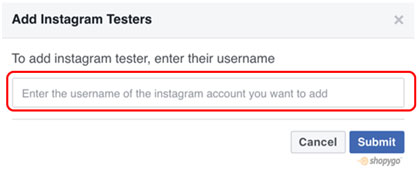
Add the Instagram User ID (username) for the Instagram Tester account you want to add. When you enter the IG username into the field, a dropdown menu of suggested IG users displays, allowing you to double-check that you have provided the correct information.
Log in to the Instagram account of the Instagram Tester you selected.
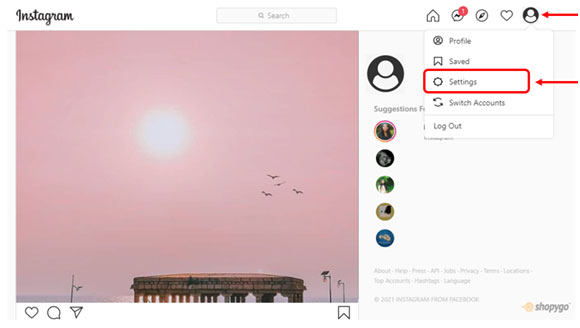
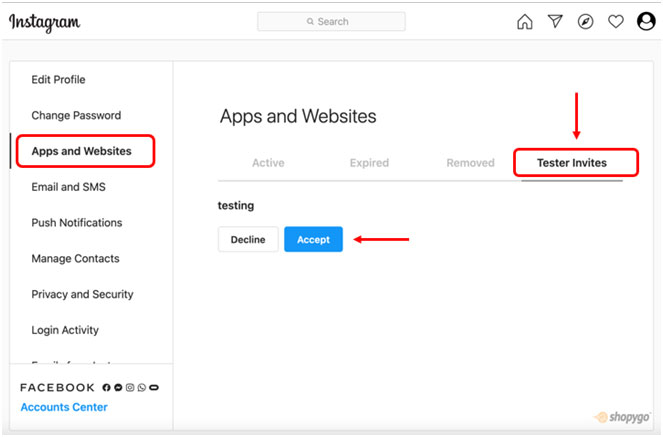
Click on the Tester Invites tab under Settings > Apps and Websites.
To accept the invitation, click Accept
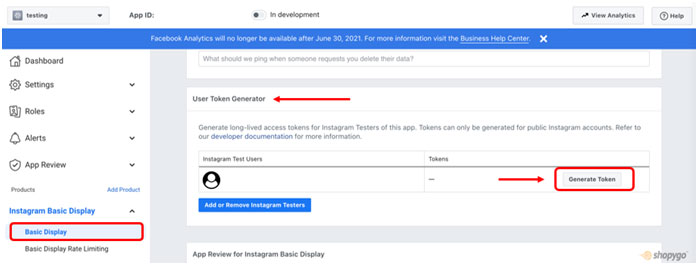
Return to the Facebook Developers dashboard. Select the app you created, then go to Basic Display. Click the Generate Token button in the User Token Generator section.
Note: Before the token is generated, you may need to re-login to your Instagram account in order to accept particular permissions.
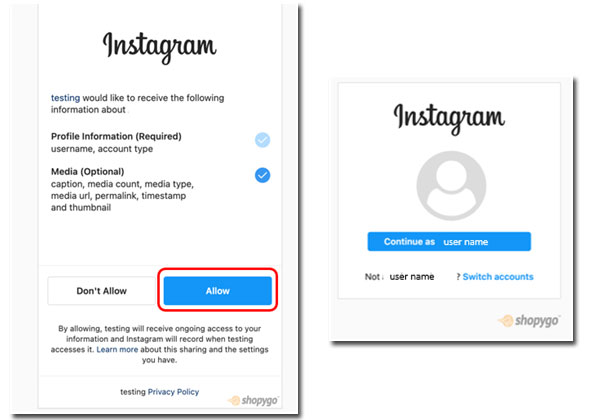
From the pop-up window, copy the Access Token.
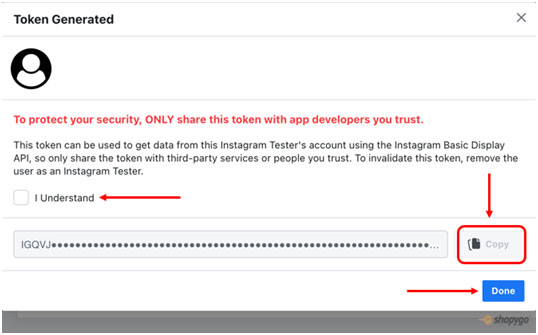
In the Plugin Setting, paste the Access Token.
Finally, login to your Shopygo dashboard, Marketing> Instagram Post and paste the Access Token into the input box provided. Then your Instagram Feed is ready to be displayed on your website.
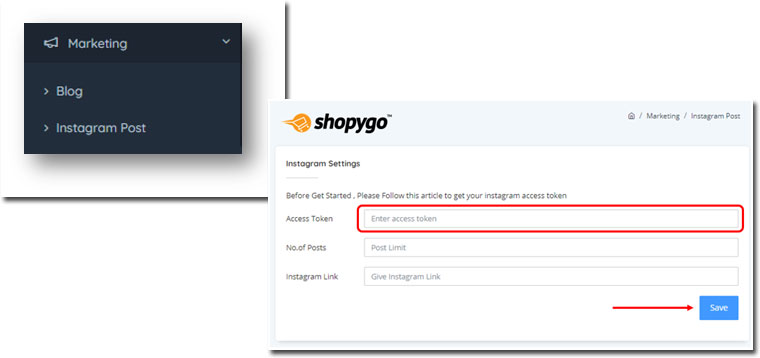
Now just click on the save button and it will connect to your Instagram account and you will be able to generate your Instagram feed in your website.